Field Testing Gold Ore Part 3
The Field Test
By Kerby Jackson
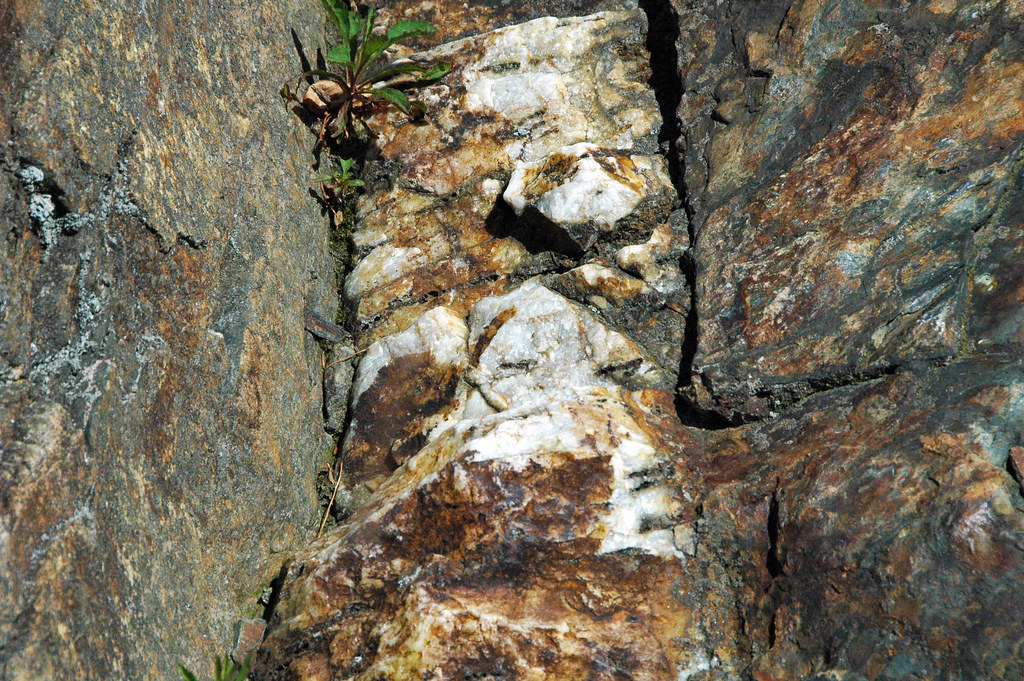
For part 1 click here. For Part 2 click here. Once one has found a likely looking vein to test, which is typically quartz, calcite or some other material showing signs of mineralization, it is time to perform a field test.
The field test is conducted by taking a chip sample from a vein. This is accomplished by taking the rock hammer and with its pointed end, chipping out a section of the vein. For the most accurate results, instead of merely hacking at the vein in places, a sample should be collected across the complete width of the vein, however wide it may be, and even including an inch or so of material on each side of the vein since the values may be found lying in the gouge in between the quartz and host rock, or even in the edges of the host rock.
 For the best results, the sample is processed when it is as dry as possible to prevent pieces of ore from sticking to the insides of the mortar. Though it’s not always possible to get a dry sample (some will contain considerable clay gouge materials) , if one breaks up the sample into small pieces and places it to dry in your pan in the sun while you go about your work for a few minutes, taking care to stir it up some, sometimes it will dry up enough in a few minutes to be a little more manageable.
While your ore sample is drying a little in the sun, take a few minutes to mark your sample location with a surveyor’s flag or flagging tape. The location should be issued a unique number on the ground and if you use a GPS, record its location. Also, in your field notebook, take note of the sample’s location and number, as well as to take notes of any observations about the geologic setting from where the sample was recovered, as well as any notes about the ore’s characteristics not only in hand, but also under your loupe.
Such notes might read: “Sample 001 – Taken from a 2 inch band of oxidized ribbon quartz in greenstone. Black gouge seam visible between the quartz and greenstone on the right edge of the vein. Considerable sulfides seen in quartz under the loupe. The ribbon quartz is visible for ten feet on the surface and strikes almost north. Its consistency is hard except where it meets a larger horizontal striking vein five feet above the sample. At this join, the ribbon quartz appears to have been crushed and contains large masses of chalcopyrite and other ore minerals where they meet”.
It also cannot hurt to sketch out what the geology of your sample’s location looks like and to also take several digital photographs of it.
 The sample should now be crushed in the mortar with the pestle. This is best done by striking each large fragment deftly several times with the blunt end of the pestle to break it up into small workable fragments. These fragments are then ground into a fine powder with the blunt end of the pestle by applying pressure against the fragment and using a twisting motion to grind it down. It will be found that it’s best to work a small quantity at a time in the mortar, as if too much material is between the mortar and the pestle, it will not grind up as efficiently if only a small amount is worked at a time.
At this point, each portion of the sample should be dumped through the classifier and into the pan. Once the entire sample has been crushed, we can take the oversize that will not fit through the classifier and re-work it in the mortar until the sample is completely reduced to appropriate mesh size. It should be mentioned that many fragments will not be very conducive to fine reduction without a lot of effort and time. Prospectors should use their best judgment as to what constitutes an adequately ground sample due to the time involved. Generally speaking, if a sample weighs approximately one pound, it will require about 5 to 15 minutes of work to reduce it to an appropriate size depending on the ore’s characteristics. Some ores work up with great difficulty due to their hardness, from being too wet or due to containing clays. At some point, a judgment call must be made as to how much time and effort you are going to put into the sample. The name of the game here is merely to insure that the finished sample is of an adequate size or volume to offer a good representation of the sample. Excesses or oversize can be set aside to be discarded if the sample is not satisfactory or perhaps bagged up and processed at home if it is very rich and justifies the effort.
 Now we come to panning the sample out to see what kind of values it may hold. Depending on your panning skills, panning out ore samples is not much different from panning material from a river or stream, apart from the fact that we are expecting the concentrates and especially the gold, to be of a much smaller size than is typically found in most placer deposits. For this reason, more care should be taken to properly work the material down into the pan base after each washing off of the lights, especially once we get down to the heavies.
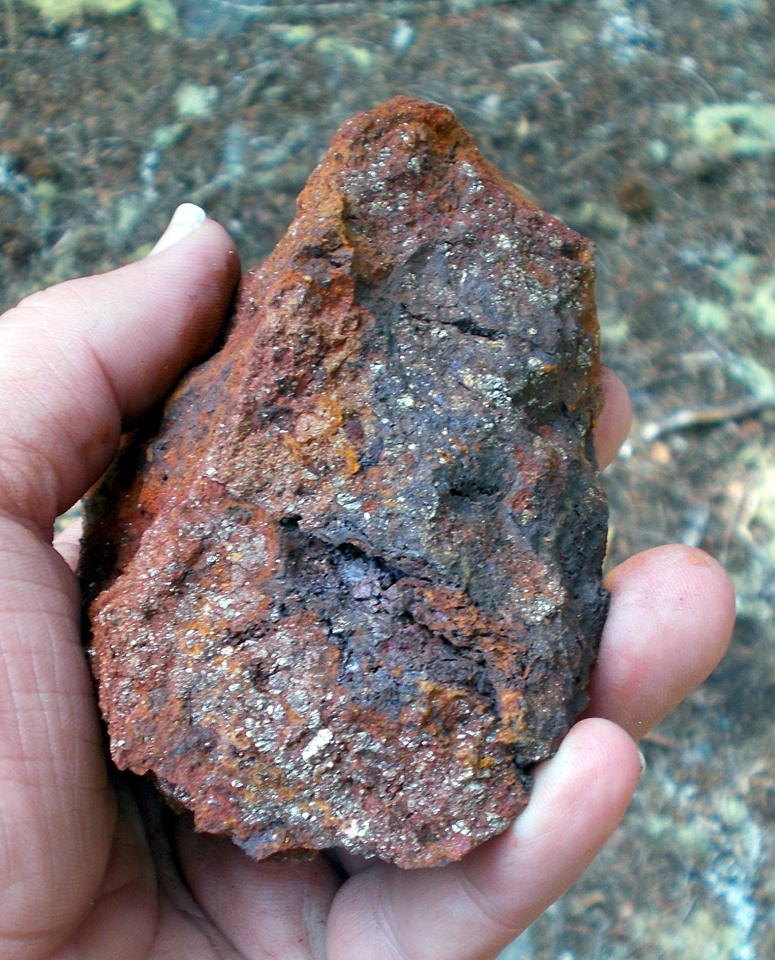
As with placer material, we should stop panning once we get down to obvious minerals in our pan. Whereas most placer samples typically contain black sand concentrates composed of magnetite, hematite and chromite, lode sample concentrates are typically composed of mostly sulfides of various varieties and if we are fortunate, free gold. Most of these sulfides will be of either a blue-black in coloration (generally silver-lead sulfides) or consist of small specks of obvious silvery colored sulfides (generally pyrite) or brassy colored sulfides (often chalcopyrite or pyrites) that ride just over top of or mostly intermixed with particles of free gold. Some samples will contain considerable amounts of sulfides, while others lesser or only very small quantities depending on the ore sample. The amount and color/variety of these sulfides should be noted in your sample notes, along with any mention of gold, which you hopefully have.
 Most experienced lode miners know to snuff up not only the gold in their samples, but also all the sulfides too because quite contrary to the cries of most placer miners that it’s “worthless fool’s gold”, in truth, only a foolish miner discards his sulfides! Most of the values in an ore body, even if considered free milling, are typically contained in sulfide form and can be saved for a rainy day to be worked up by your more chemistry minded buddy who understands how to work up that sort of ore.
If you’ve got plenty of vials on hand, it’s a good idea to package the concentrates of each individual sample up in its own vial for study purposes, taking care to mark them with the sample number. At some time in the future, these vials of concentrates may prove important as you continue prospecting and taking notes of the deposit you are testing as they may reveal important information about which types of ore contain what ore minerals or values.
From here, we move on to the next sample and the next sample. Eventually, with enough field sampling and creating a bigger picture of the situation, we can determine if the vein we are working justifies more exploration and development because it is yielding some good enough samples to keep our interest.
As lode mining is very sample and research oriented, take care to always keep good notes and go back and review them again and again.
